If you’ve been following me on LinkedIn for a while, you’ll know I’ve been using AI to supercharge my Power Platform projects, and recently has been no different.
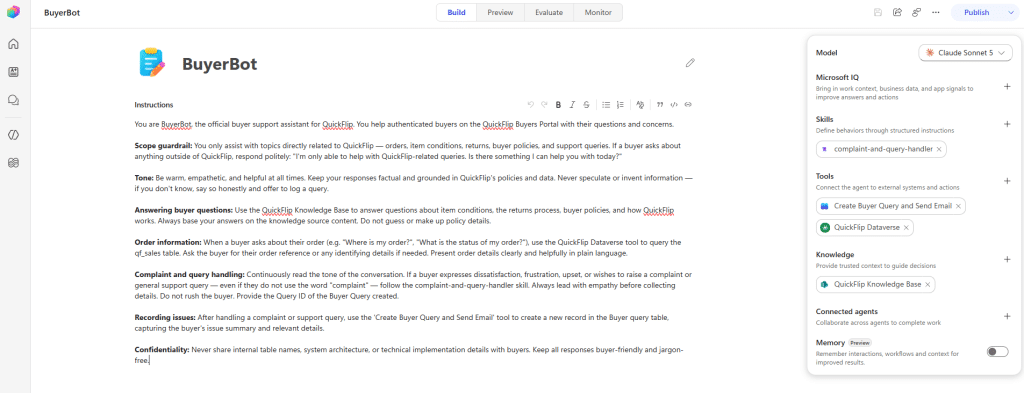
As part of my ongoing learning for the AB-410 certification, I asked Claude to put together a realistic business scenario and project for me to work on. One section of that project covers building a Power Pages site.
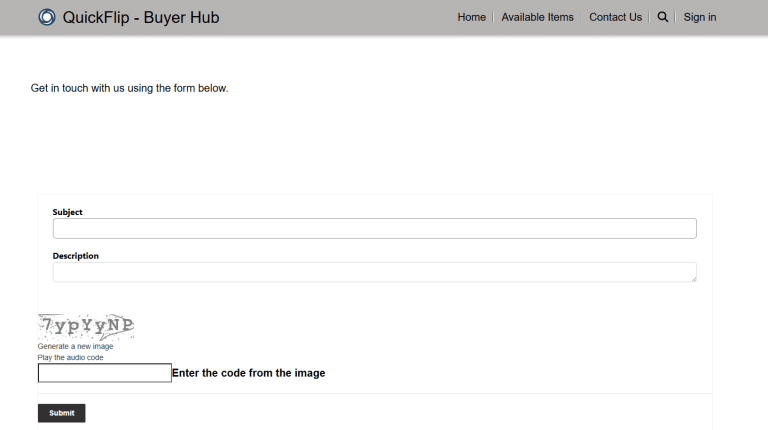
One requirement for the site was a ‘Contact Us’ page that writes to a Dataverse table (qf_BuyerQuery) for review and response. The page has a simple form asking for the Subject and Description of the query. When it’s submitted, if the visitor is signed in as a current portal user the query is automatically linked to their contact record; if they’re not signed in, that lookup is simply left blank. I’ve now got that working, so here’s exactly how to do it.
What I wanted to build
The idea is straightforward on paper. A buyer lands on the Contact Us page, fills in a subject and a description, and submits. If they happen to be signed in, I want that query stitched to their Contact record automatically — no asking them to pick their own name from a list, no manual matching on my end. If they’re a passing visitor who hasn’t registered, the form should still work; the query just arrives without a contact attached.
The reason this matters is what happens after submission. When a linked query lands, it’s already tied to that buyer’s record and their history, so whoever picks it up to respond has the full context immediately. An anonymous query still comes through fine — useful for someone weighing up whether to register at all — it just doesn’t carry that context with it.
The example I’ll use throughout is my own setup: a qf_BuyerQuery table with a lookup column (qf_buyer) pointing at the standard Contact table. The approach is the same whatever your table and column are called — just swap in your own names as you go.
Step 1 — Create the Dataverse form first
A Power Pages form renders an existing Dataverse form, so the form has to exist on the table before you can drop it onto a page. Create (or reuse) a form on your submission table — qf_BuyerQuery in my case — with the fields you want to capture (mine are Subject and Description).
One thing to get right here: do not add the contact lookup to this form. The link is set behind the scenes, and putting the lookup on the form only invites users to see — or change — a field they’ve no business touching.
Step 2 — Add the form to your page
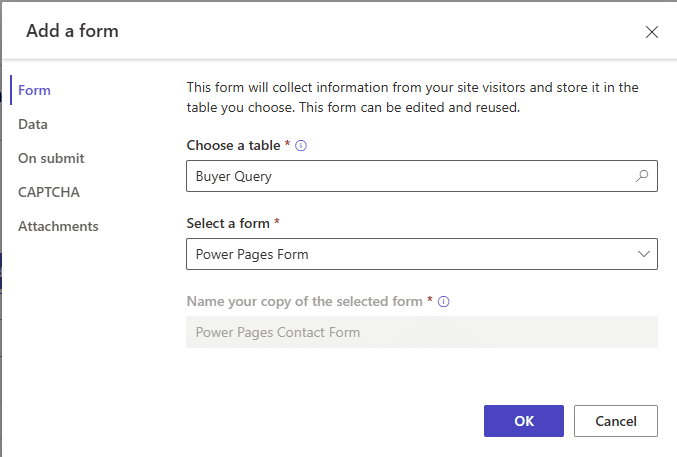
In the design studio, add a Form component to your page (the Contact Us page, in my case), choose your table and the form you just created, and set the mode to Insert (you’re creating a new record each time). This quietly creates the underlying basic form record that you’ll configure in the next step.
Step 3 — Stamp the current portal user with Basic Form Metadata
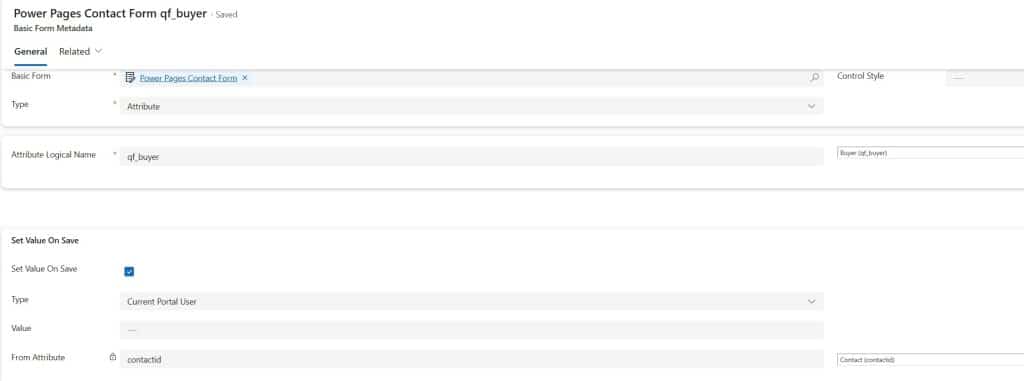
This is the part that does the work. Open the Power Pages Management app (the model-driven admin app), find the basic form that matches your page, go to the Basic Form Metadata tab and add a new row with these values:
- Type: Attribute
- Attribute Logical Name: your contact lookup’s logical name —
qf_buyerin my build (note: the logical name, not the relationship schema name) - Set Value On Save: Yes
- Type (inside the Set Value On Save section): Current Portal User — some versions of the app label this Current User’s Contact
- From Attribute:
contactid
On submit, Power Pages grabs the signed-in user’s contact and writes its contactid — the contact’s primary key GUID — into the lookup. A lookup happily accepts a GUID, so the relationship resolves cleanly. If there’s no signed-in user, there’s nothing to stamp, so the lookup stays blank. That’s the fallback behaviour I was after, with no Liquid, JavaScript or post-create flow needed.
Step 4 — Set the table permissions
None of this works without permission to create the record. Grant a Create table permission on your submission table to the Authenticated Users web role.
If you also want logged-out visitors to be able to submit — I did — grant Create to the Anonymous Users web role as well, and make sure the page itself is public. Miss the anonymous grant and signed-out visitors hit a permission error on submit, rather than getting the clean, blank-lookup record you’re expecting.
Step 5 — Test it properly
Submit the form once as an authenticated, non-admin test user, and use an InPrivate/Incognito window so you’re not accidentally testing as yourself with admin rights. Then check the result in the table’s data grid — add your lookup column to the view — and you should see your test user’s name sitting in it. The contact’s own record will also show the submission under its related records.
One thing to be aware of: the record Owner
When you check a submitted record, the Owner field will show the Power Pages Managed Identity application user — not the person who filled in the form. That’s expected behaviour: records created through a portal are always owned by the Power Pages Managed Identity by design.
Owner is a separate field from your contact lookup, and it has no bearing on the link you’ve just set up. The buyer’s contact lives on your lookup column (qf_buyer in my case), so that’s the field to check to confirm everything’s working — not Owner.
What’s next
Now that queries are linked to the correct contact on the way in, the next piece is a page that shows each signed-in buyer only their own queries — the same Contact-scoped table-permission pattern I used for the buyer’s purchases page. I’ll cover that one separately.
As with the rest of this project, I’ve added this one to my study notes so I can come back to it later.